Alright, here we go!
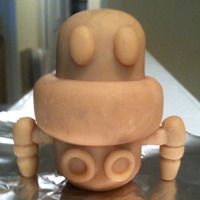
I started with a Baked Sculpey model of 'Bip'
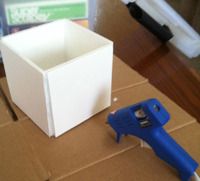
Then I decided to use Foam Core board to make the mold box. This is what I'll be pouring the rubber mold into. I made sure to hot glue the seams and tape the outside to make sure there would be no leaking.

Then came the hardest part. The bottom half of the mold needed to be filled with clay, with the character embedded in it. The top of the rubber mold is actually poured first, so the bottom of the mold has to be filled. . . In hindsight I used the wrong type of clay, as it was too stiff and really hard to work with. I actually managed to break the original sculpt 2-3 times trying to embed him half way in the clay and had to fix him (which left him with a slightly turned head. . . ) But I finally got it all ready to go.

Once I poured the rubber into the mold, and waited 6 hours for it to set, I removed the bottom and one side of my mold box to remove all of the clay, and clean it up (took a while!) I then cut a few triangular holes in the first half of the mold. These will help to 'lock' the mold in place when I finish.
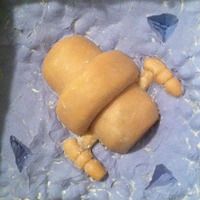
It also took a bit of trimming, as some of the rubber squeezed its way under the clay.

Then after replacing the side of the box, re-gluing, and adding a bottom (just in case there were leaks) I sprayed a releasing agent over the mold (or else the two sides would stick together) and poured my second half. I made sure to add a funnel shaped piece of clay to the back of the character, which will allow a hole to pour the casing material into the mold when finished. After 6 more hours this is what I ended up with!
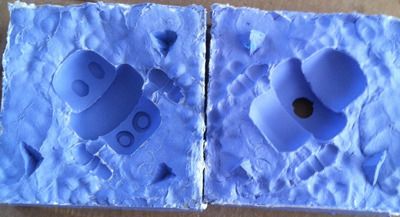
I then pulled out the original sculpt, re-coated with releasing agent, and stuck it back together. I taped it closed (securely but not so tight as to deform the mold) and gave my first attempt at Resin casting! It took a full 24 hours to cure, and in the end this is what I came up with!
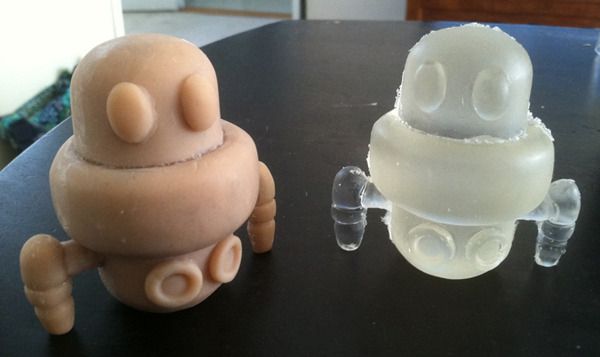
Not bad for a first attempt! Unfortunately the resin did settle (even after adding extra material) leaving a nice hole in his back, and the rocket/arms didn't fill entirely leaving them half empty in the back. There were also a significant amount of bubbles on his back as well. I still need to sand him down, as he's a bit ragged on his seams, but I was shocked to find that my signature on the bottom came out perfectly! So there we go! I definitely want to try this with colored resin, maybe other materials, and get the process down pat!
These guys may also go up for sale on Etsy sometime. . . I plan to number and sign all of them :)
That's all for now!
-Kata

No comments:
Post a Comment